The program line wizard streamlines the creation of your trading programs, taking you through the creation step-by-step.
A program line is the main aspect of a trading program that earns rebate. Each program line belongs to a single trading program, which in turn belongs to a single trading partner.
We recommend using the program line wizard if you are not yet familiar with setting up program lines, or if you are new to Enable.
Users with edit permissions for program lines have the ability to create program lines within Enable for the included trading partners within their access settings. If you require additional help, please reach out to our support team here.
There are two ways to create a program line using the wizard:
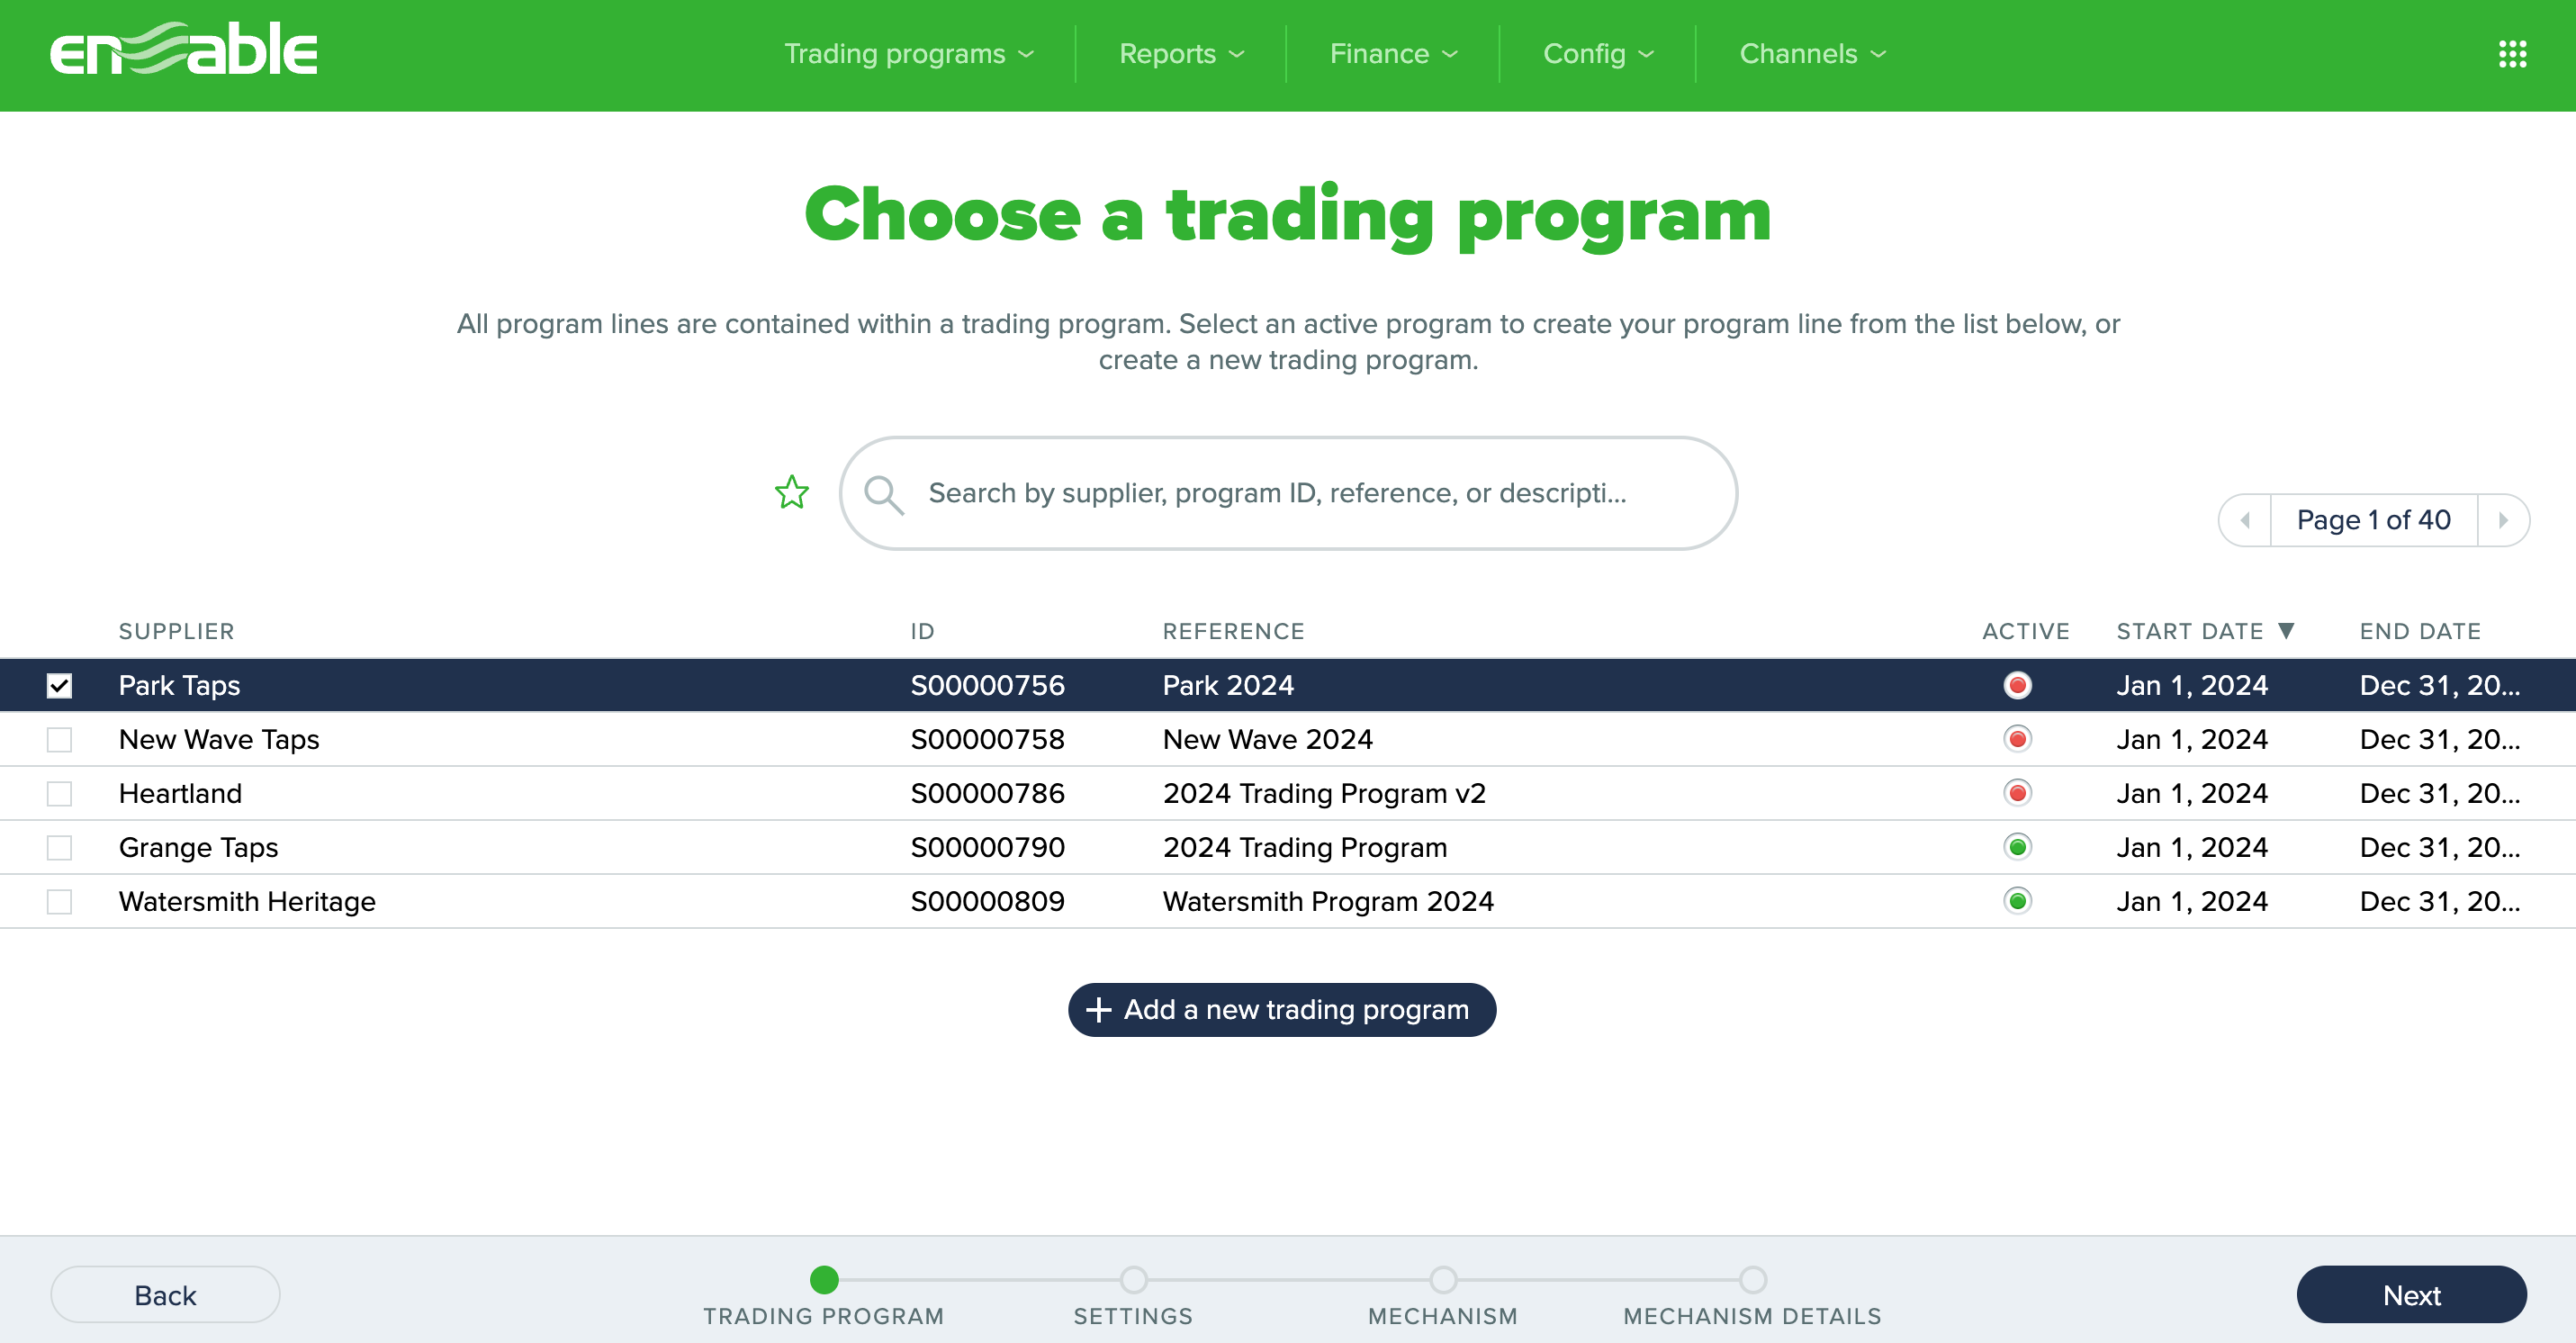
If you have chosen to create a program line via the Activity tab, the first step of the wizard will be to choose a trading program to add program lines to.
Use the search box to locate the trading program, click on a column header to sort the column, or view more results using the page selection menu.
Once you have selected a trading program, click the Next button.
Alternatively, if your trading program has not yet been created, click the Add a new trading program button to be taken through the trading program wizard. Learn more about setting up a trading program here.
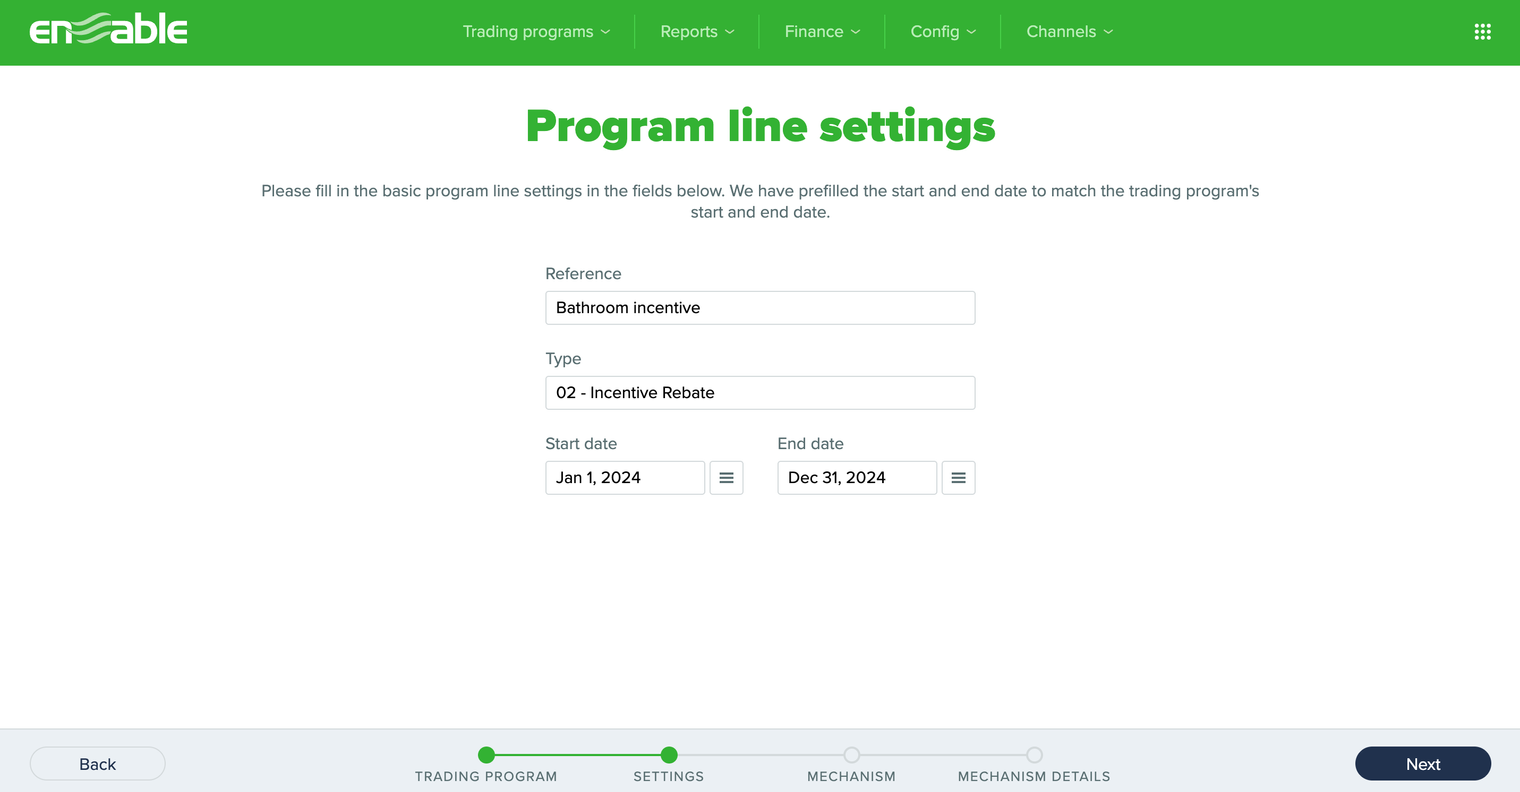
Populate the following basic program line settings:
Once you have chosen your settings, click the Next button.
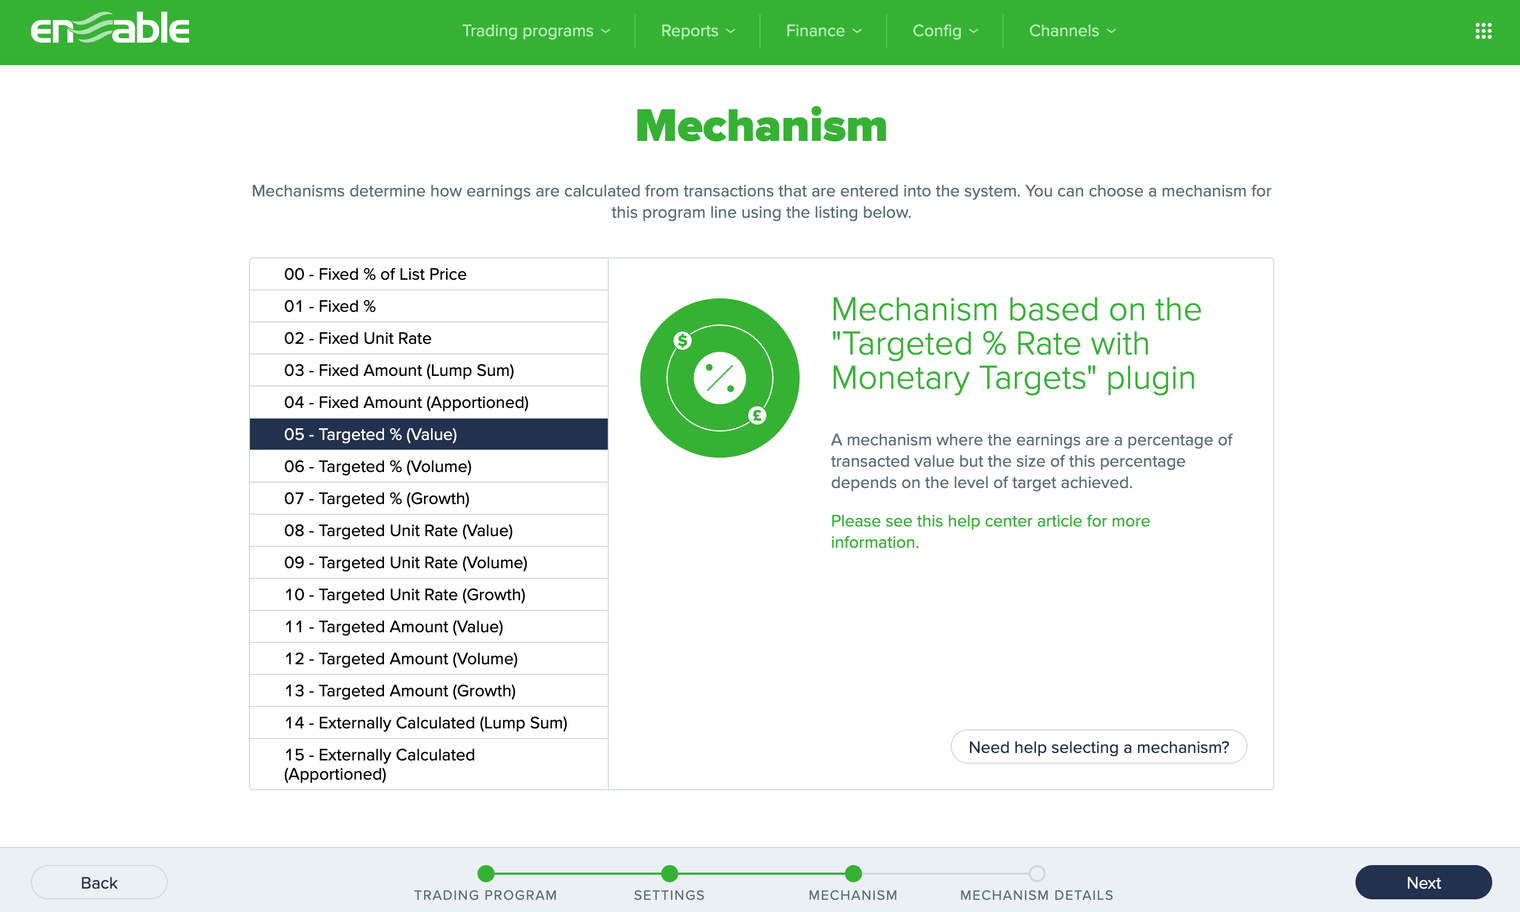
Mechanisms determine how earnings are calculated from transactions uploaded into Enable.
Select a mechanism to see a description of the calculation, or click on the linked help center article for more information. Each mechanism will contain unique calculations; see our guidance on mechanisms to learn more.
Once you have selected the mechanism you would like to use, click the Next button.
Choose the payment options for your program line below:
Depending on the mechanism you selected, you will also need to populate the relevant rate, value or targets here.
Once you have chosen your mechanism details, click the Continue button.

Now that you have entered the above settings via the wizard, the main program line settings page is displayed. Note: This is also the page that is displayed for you to populate if you choose to manually create a program line.
If required, populate the below optional settings:
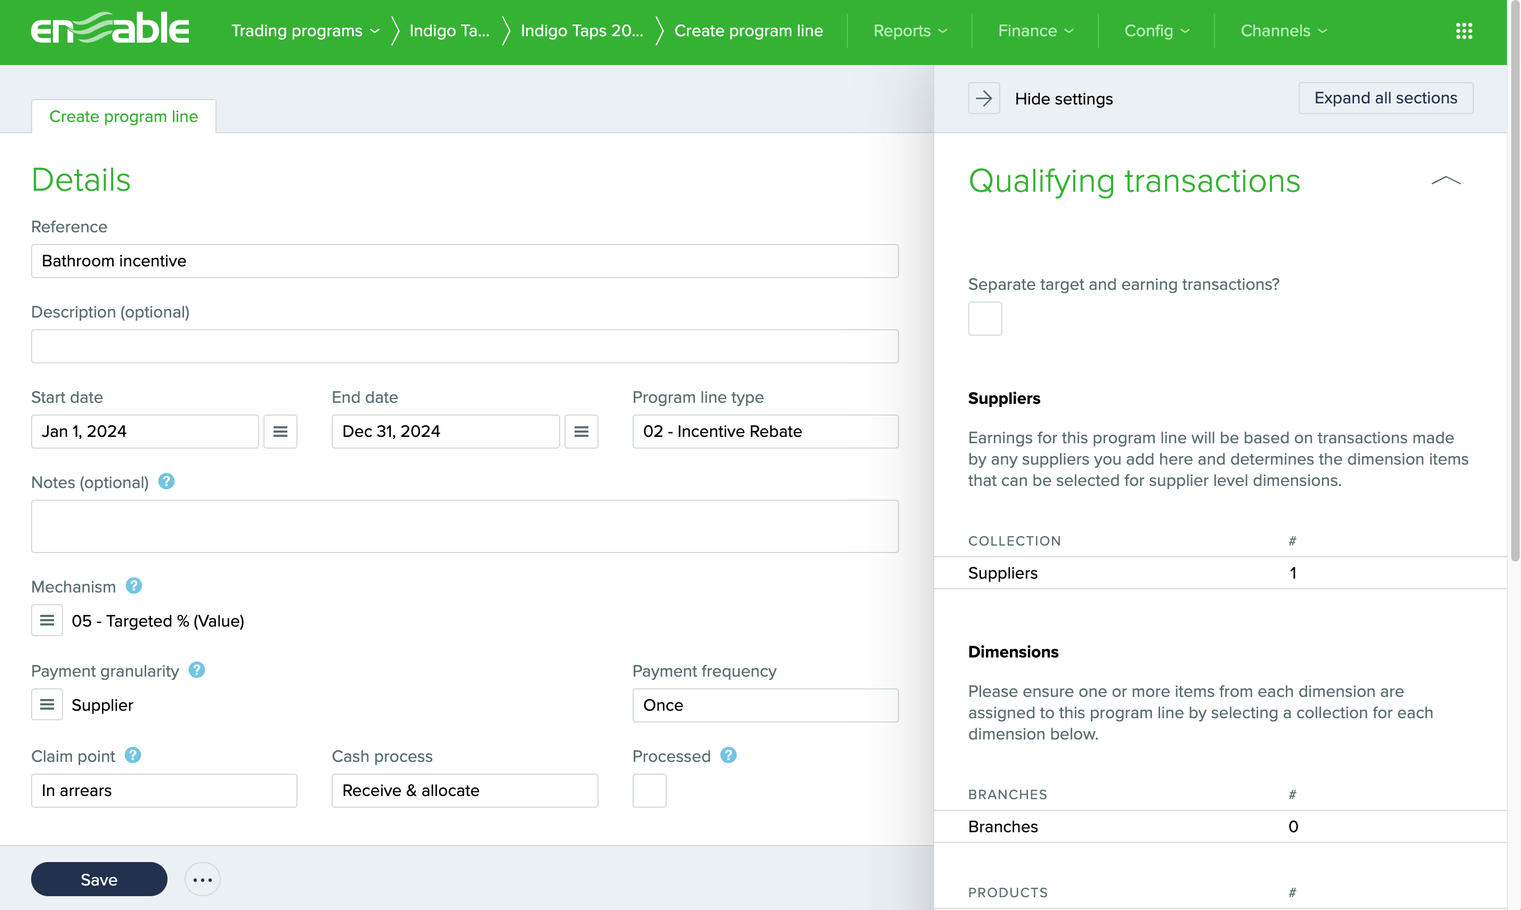
Before you can save your program line, you will need to choose which dimension items qualify for rebate within the Qualifying transactions section. Learn more about assigning dimension items here.
Once you are happy with your program line settings, click the Save button. Your program line will now appear against your selected trading program.
Ready to select which items will qualify for rebate? Learn how to assign dimension items in a program line here.
Already selected the program line’s dimension items and completed your program line settings? Learn how to add terms items to the trading program here.