Enable primarily uses CSV files to manage a wide range of data imports and exports. However, there are some common issues which you might encounter when using Excel to manage any CSV files.
A CSV (Comma Separated Values) file is by definition a file of values separated by commas. For example, in Excel, you would see:

If this same file was opened using a text editor (like note pad) then this actually looks like:
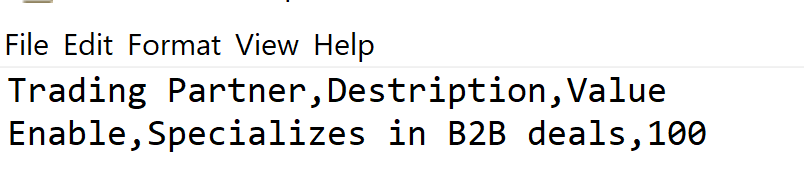
Tip: Viewing the CSV like this is a great way to identify erroneous whitespace issues which are much more difficult to see in Excel.
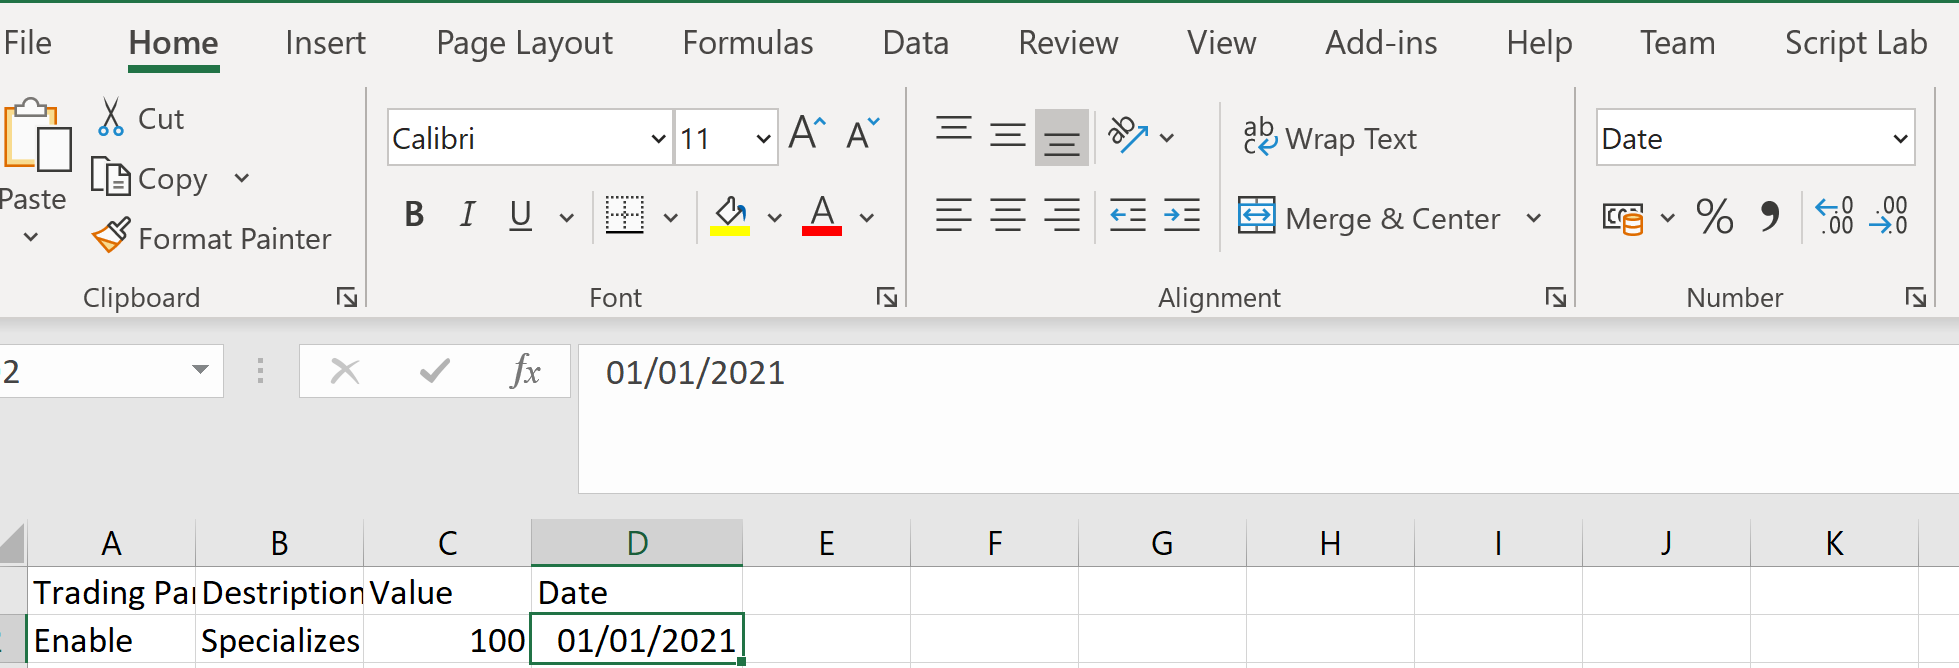
Excel is a powerful tool for managing data tables and allowing users to add quickly, edit, and delete rows of data. However, it tries to assign data types to cells based on cell values. This is illustrated below where a date has been added to the example CSV:

Opening this is Excel we can see the value has changed.
In the text file view, we can see this has changed the original data:

This is because Excel has assigned a Date type to the D cells with dates (see top right of the Excel image). The drop-down should be changed to text; this will stop values from being automatically formatted.
Excel can load CSV files without editing the data. This is useful for dates or when codes/ references begin with zeros, which need to be preserved when uploaded to the Enable application.
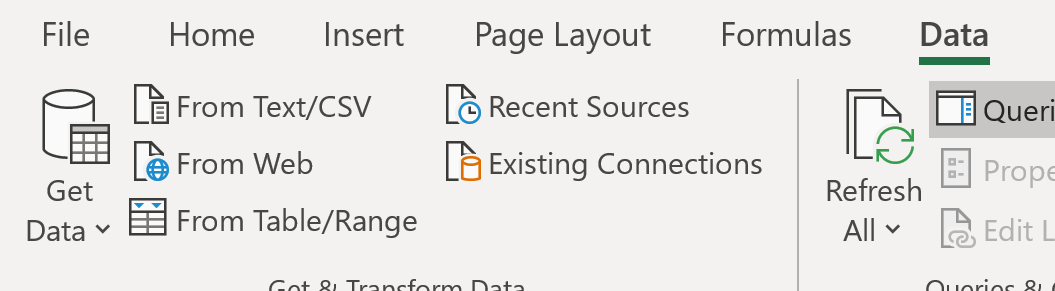
Within the data tab is a button to import Text or CSV Files:
After selecting The CSV file, the following Dialog will open:

Using the Transform Data button, you can review the data format settings (i.e. Date).
Here we are interested in the date column, but the following changes can just as easily be applied to any other column. For data imports, there would also be no harm in making these changes to every column.

We can see the date column is at the end of the formula, to make sure data is imported without changes occurring this should be set to a text type. To do this:
{"Date", type date}
should be changed to:
{"Date", type text}
After this, the "close and load" button can be used to import the data into Excel.
Excel may apply formatting and filters to the data. The "Table Styles" tab has a clear button to remove unwanted styles, for filters, the appropriate checkbox under "Table Style Options" can be deselected.
