A price list is a group of prices that share the same name, the same currency and which operate over the same combination of dimensions and optionally trading partners.
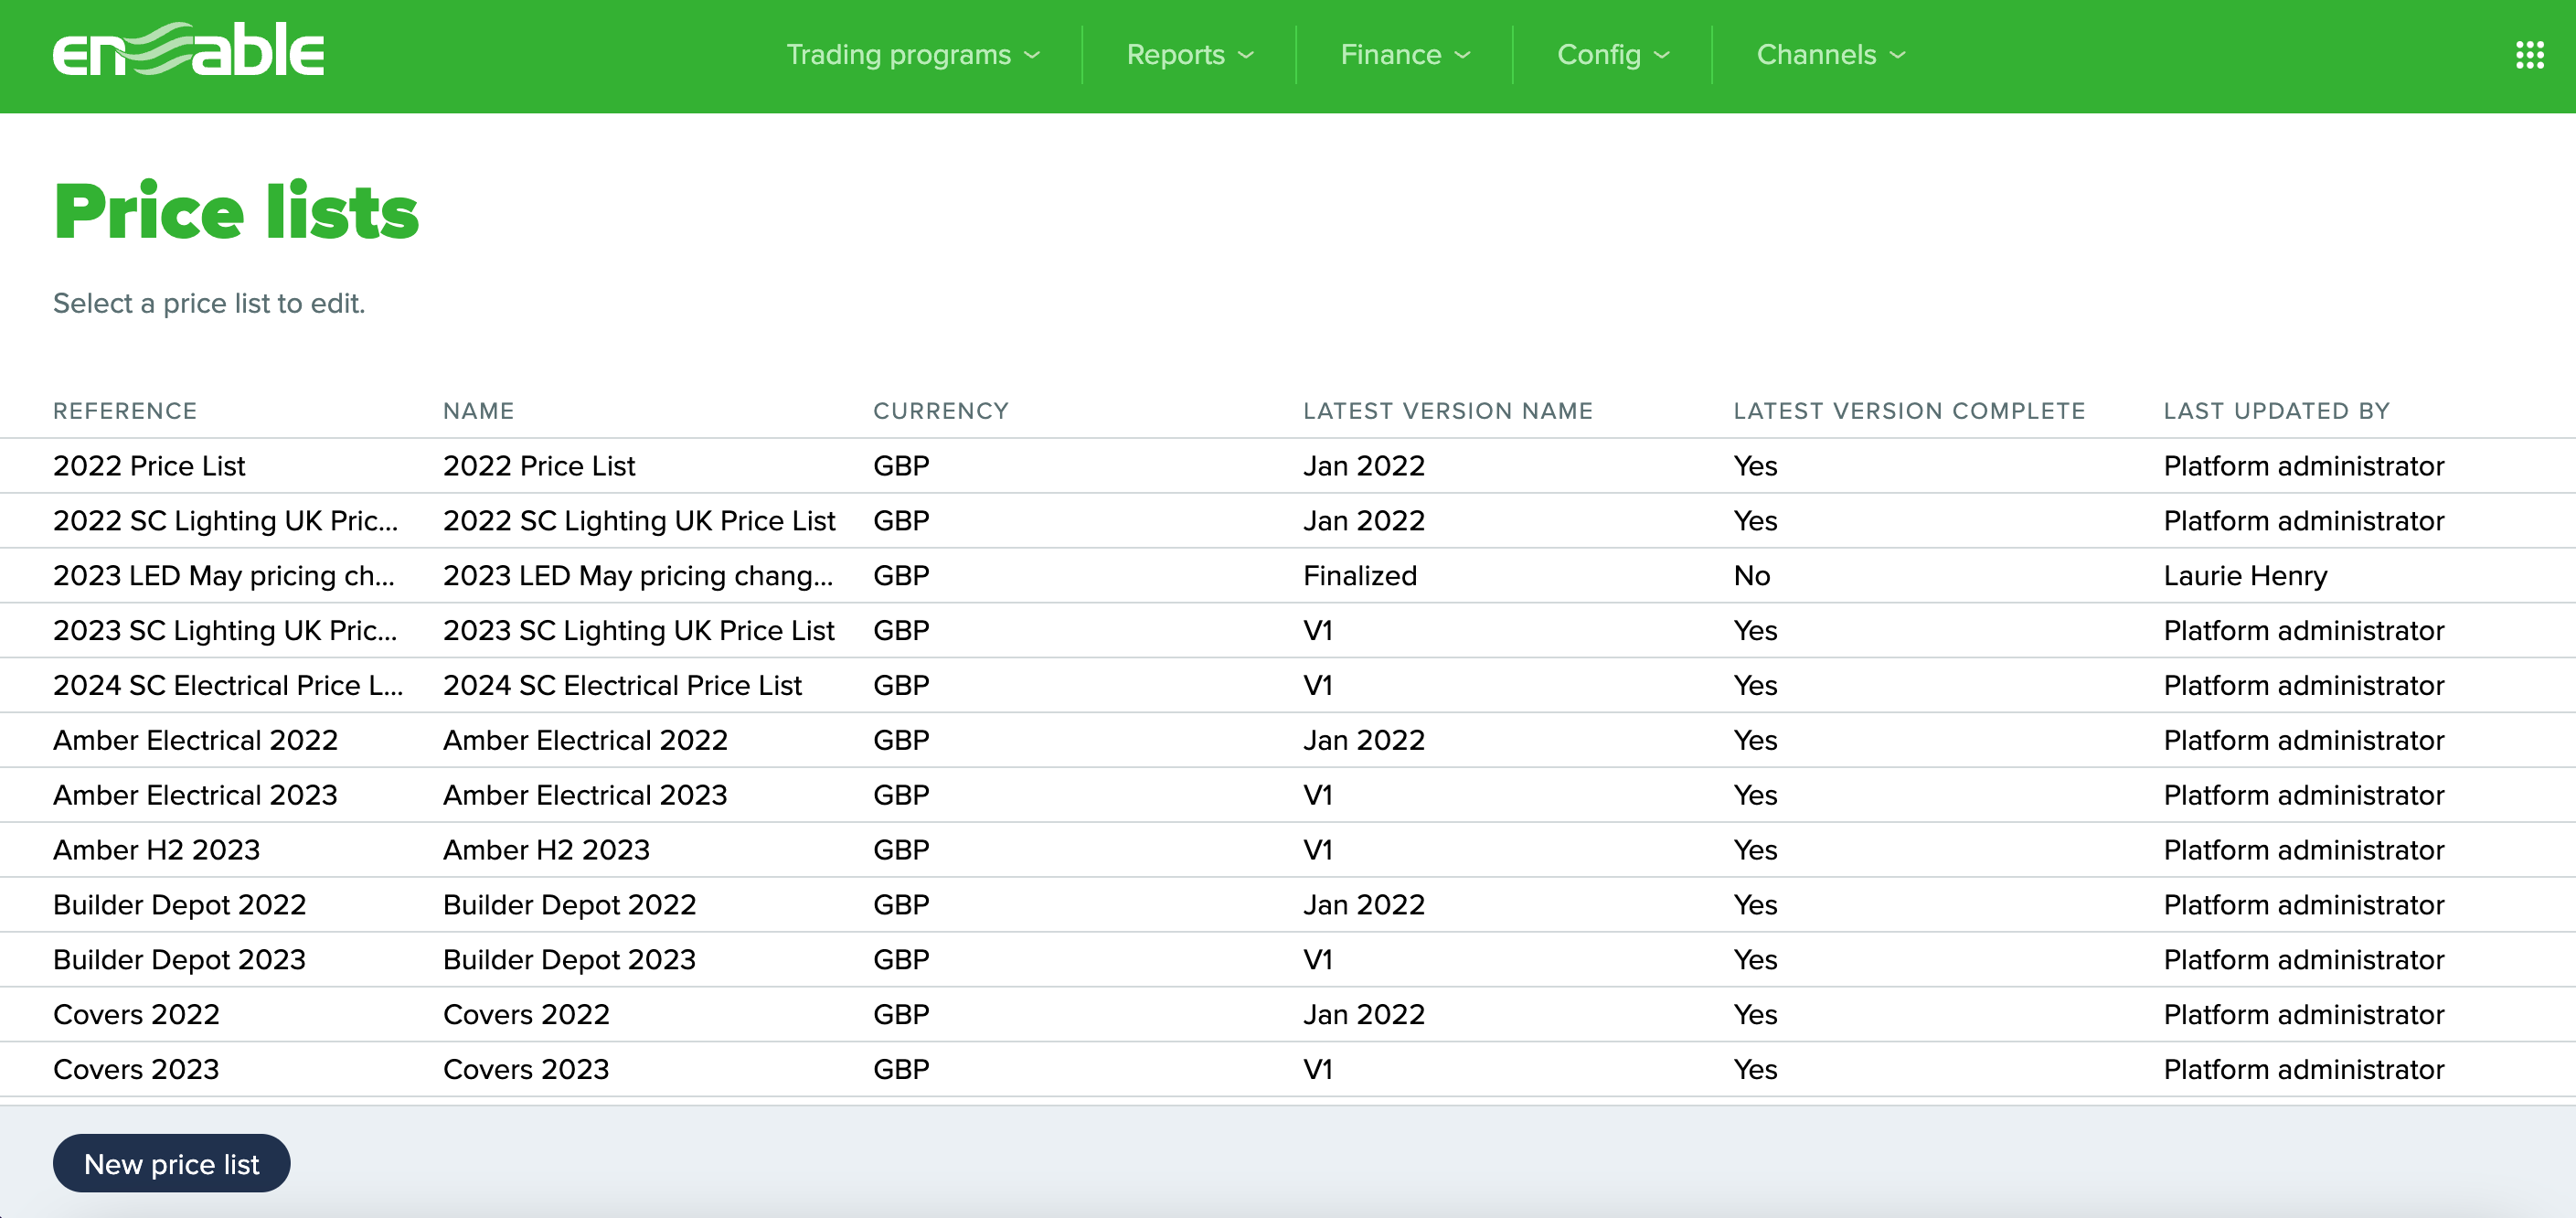
Price lists are located within Config area of the Trading programs app.
Channel admin users with Pricing app access will have access to the Config area and pricing configuration within Enable. If you require additional help, please reach out to our support team here.
To navigate to pricing config:
Step 1: Click on Config in the green banner at the top of the page.
Step 2: Click on Pricing in the drop-down menu. You will automatically be navigated to Pricing within the Config area (displayed below).
Before adding prices, you will need to create the price list.
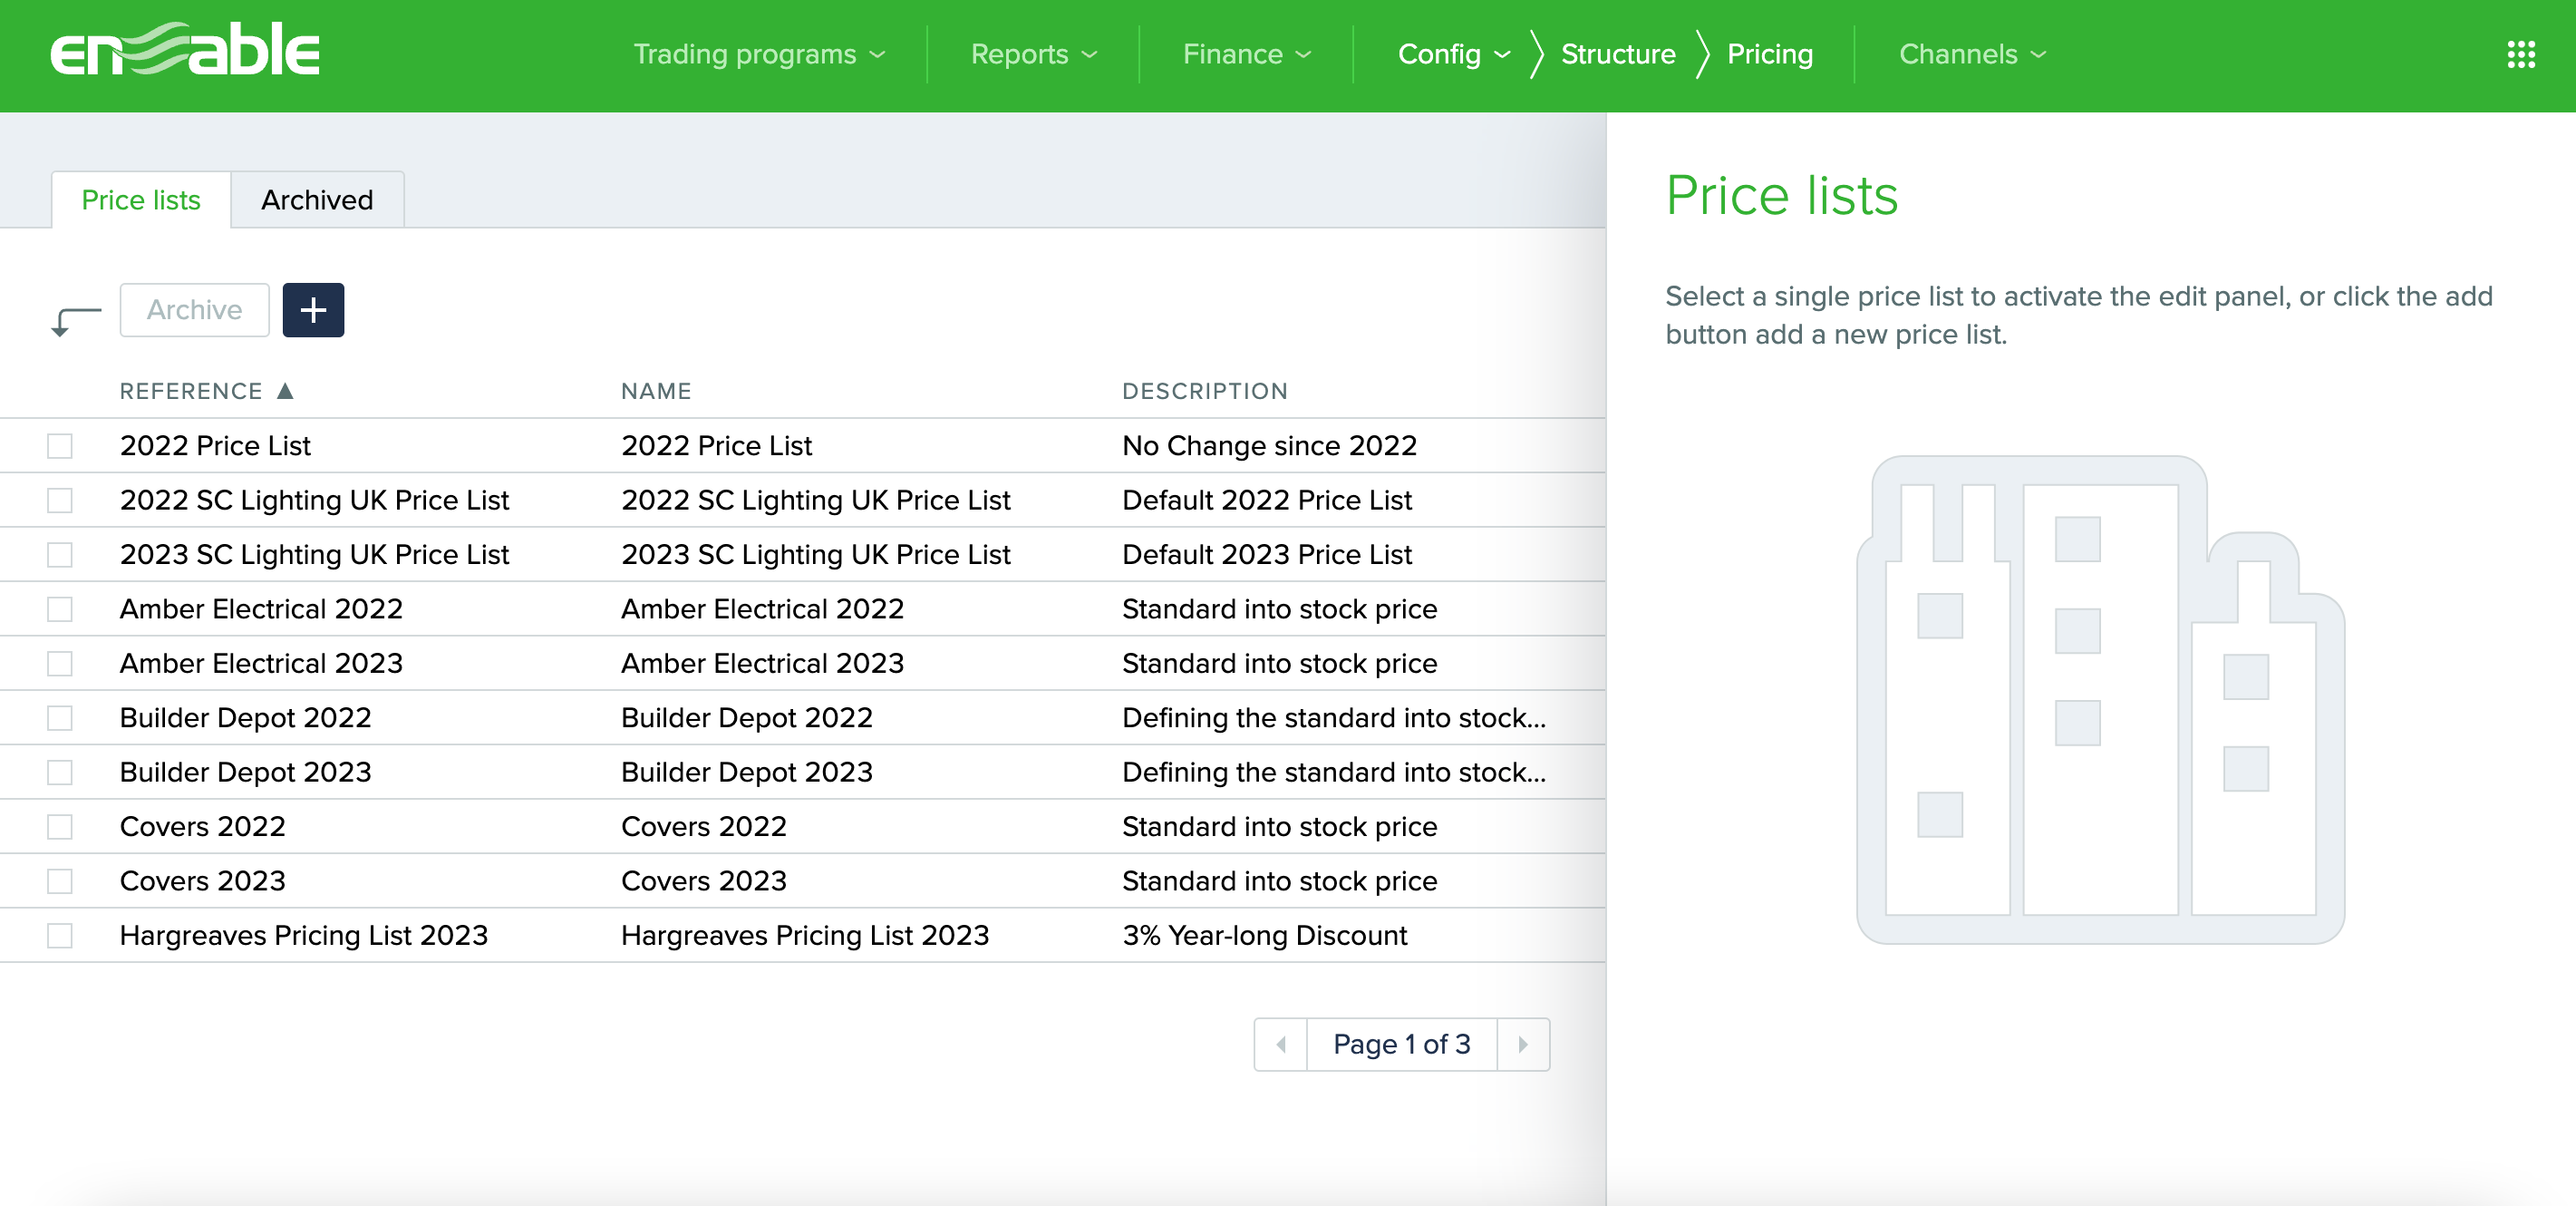
Step 1: Click the New price list button at the bottom of the page. You will automatically be navigated to Pricing within the Config Structure area (displayed below).
Step 2: Click the + button at the top of the page. Price list details to be populated will automatically display on the right of the page.
Step 3: Populate the following Price list details:
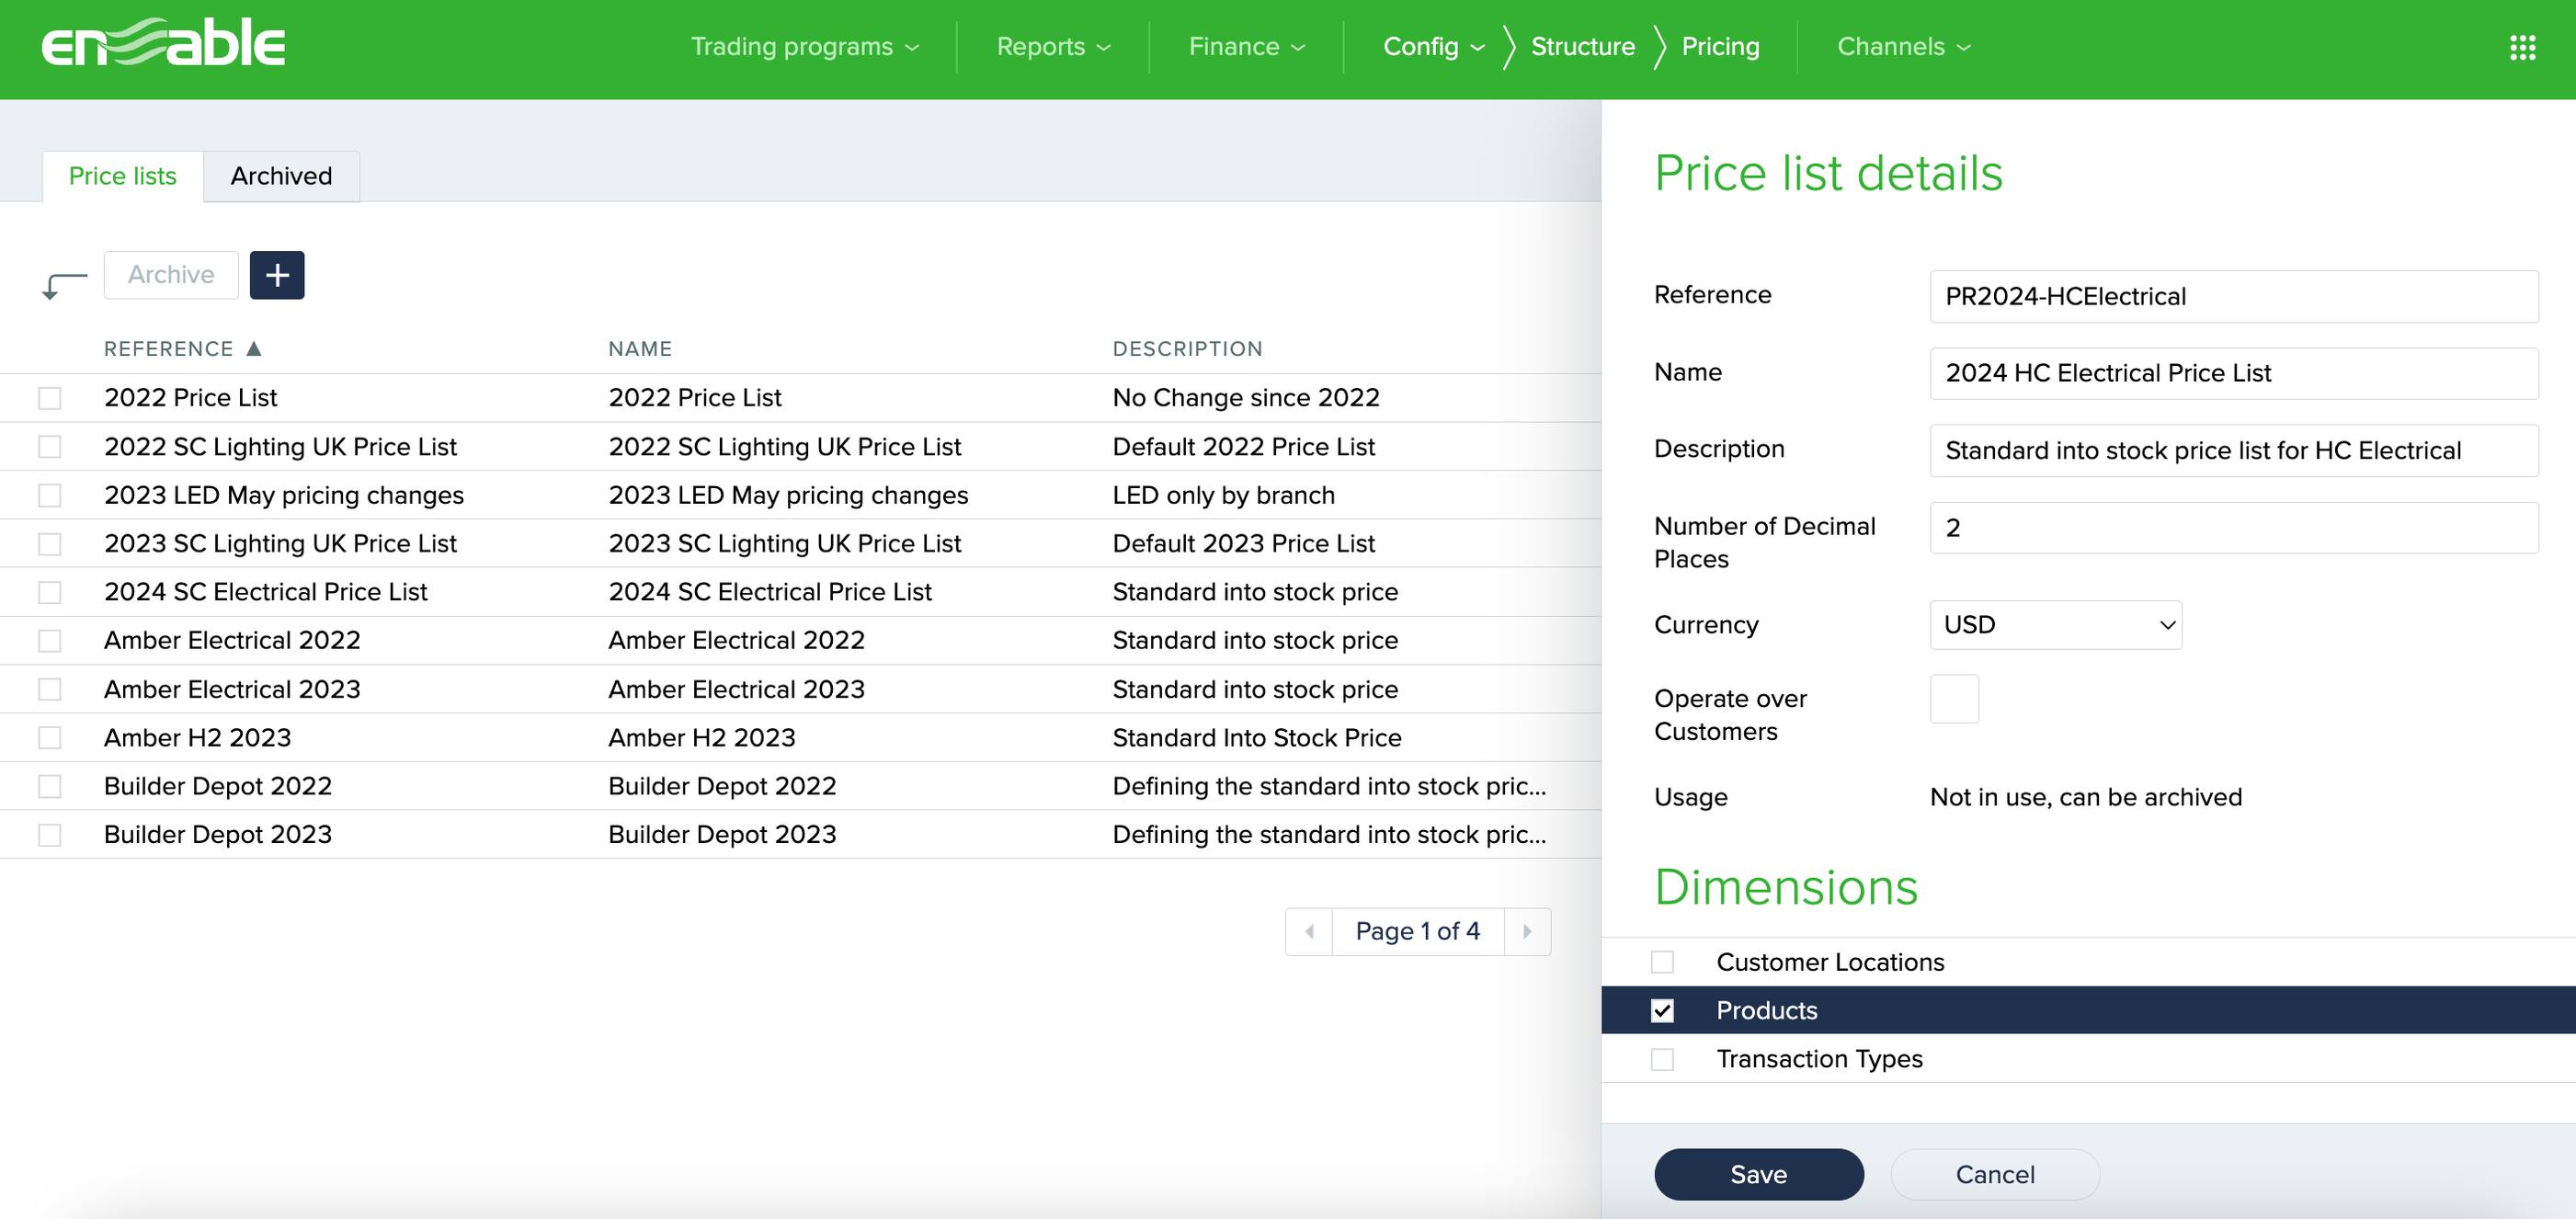
Step 4: Under Dimensions, select the dimension this price list should apply to, e.g. selecting Products would allow prices to be added per product.
Step 5: Click Save. You will automatically be navigated to populate the new version of the new price list.
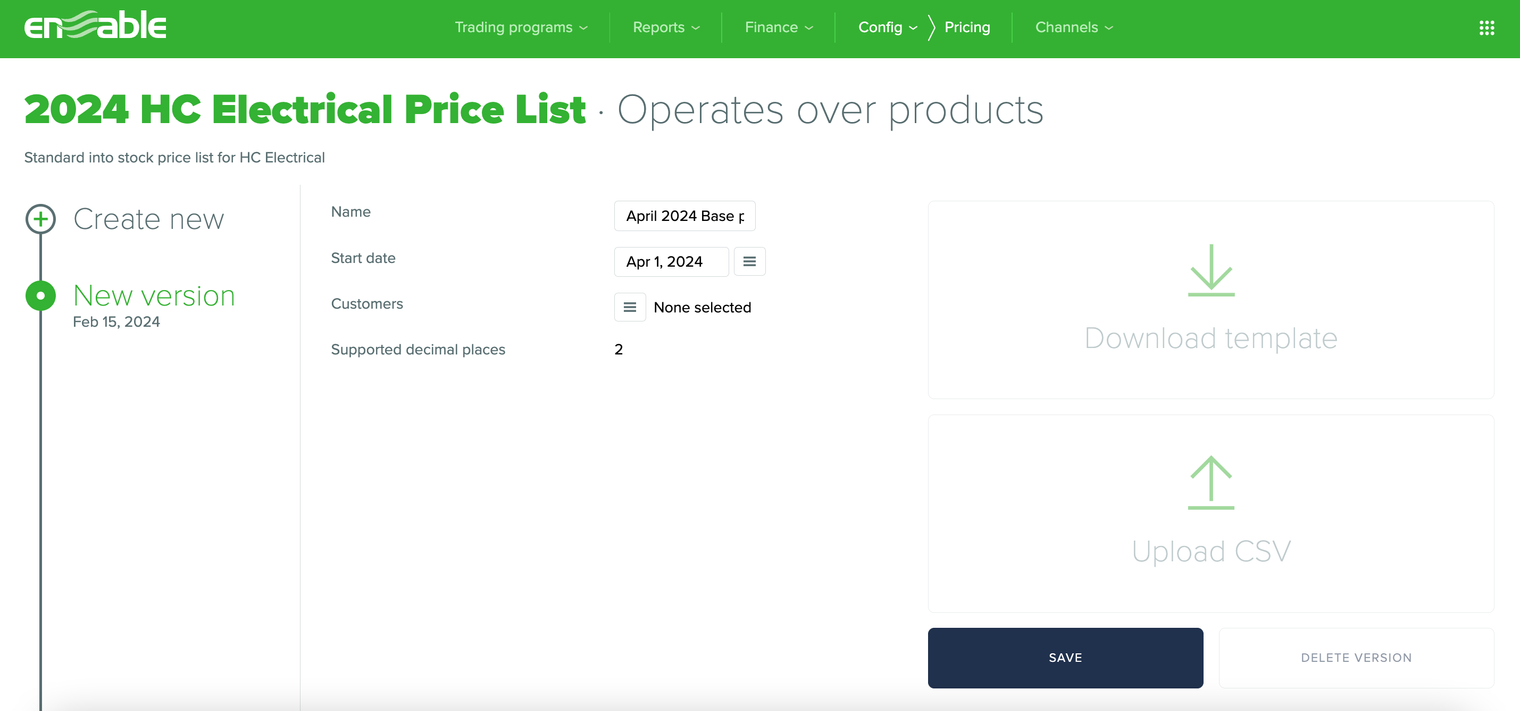
Within the New version, populate the following details:
Note: Price list versions do not have end dates. If you are using pricing for trading programs, some program lines will be locked to specific versions and others will use the latest version with the latest start date. If you are using pricing for special pricing agreements, this will depend on the Relevant Price List Version setting on the SPA, e.g. if using Active Price List at time of sale, then the price list version at the time of sale will be used.
Once details have been populated, click the Save button.
Now that you have created and saved the new price list and version details, your prices will need to be populated for the price list.
Step 1: Click Download template on the right of the page.

Step 2: Populate the downloaded price list template CSV file, using the guidance below.
The CSV template will be pre-populated, containing combinations of products (or other dimension items) or trading partners, where you can enter the price for each combination.
The downloaded price list template will display three columns containing the following:
When populating the price list template CSV file, you should ensure the following requirements are followed:
Once you have populated the CSV file with prices following the requirements above, the price list is ready to be uploaded to the price list version.
Step 1: Click Upload CSV on the right of the page.
Step 2: Click the Upload button to browse file selection to select your completed price list file.
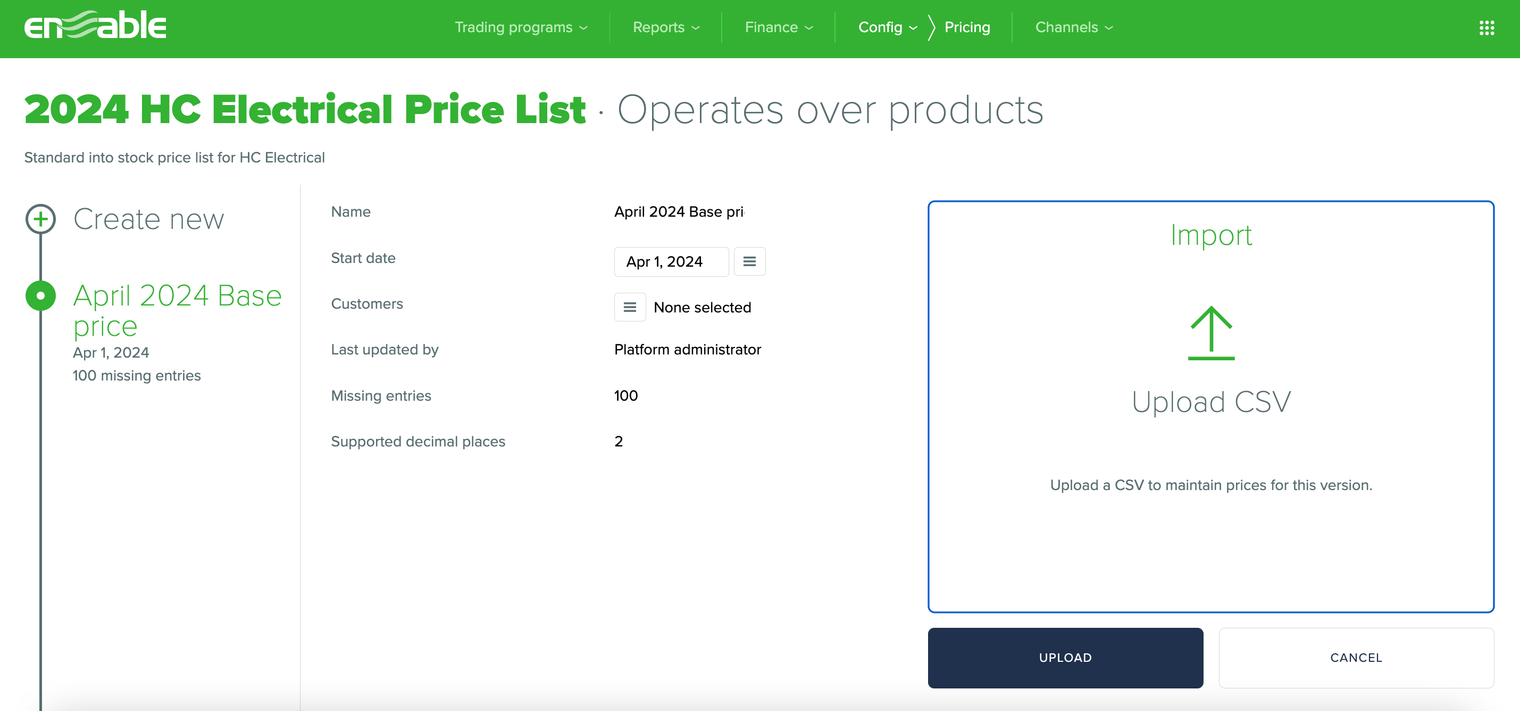
Step 3: Click Start validation in the lower right of the page.
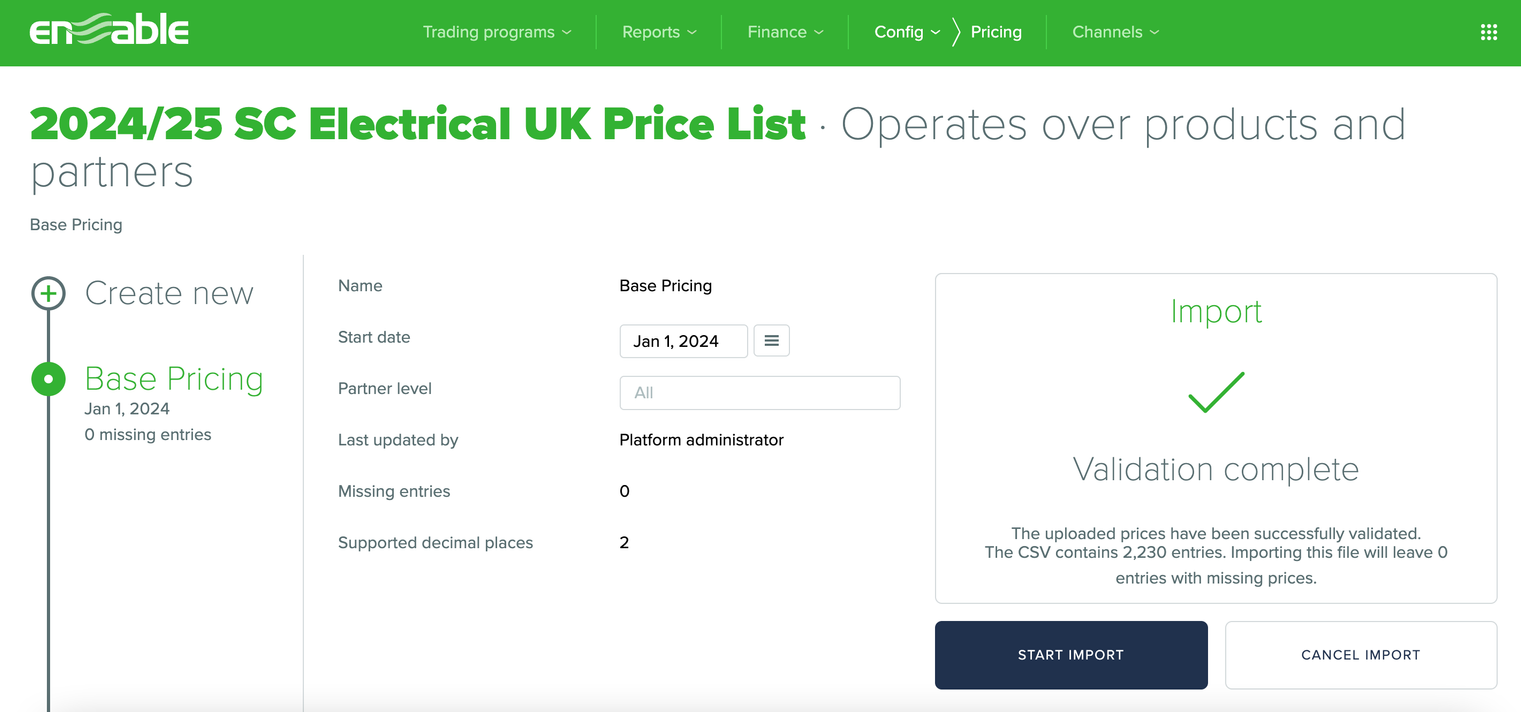
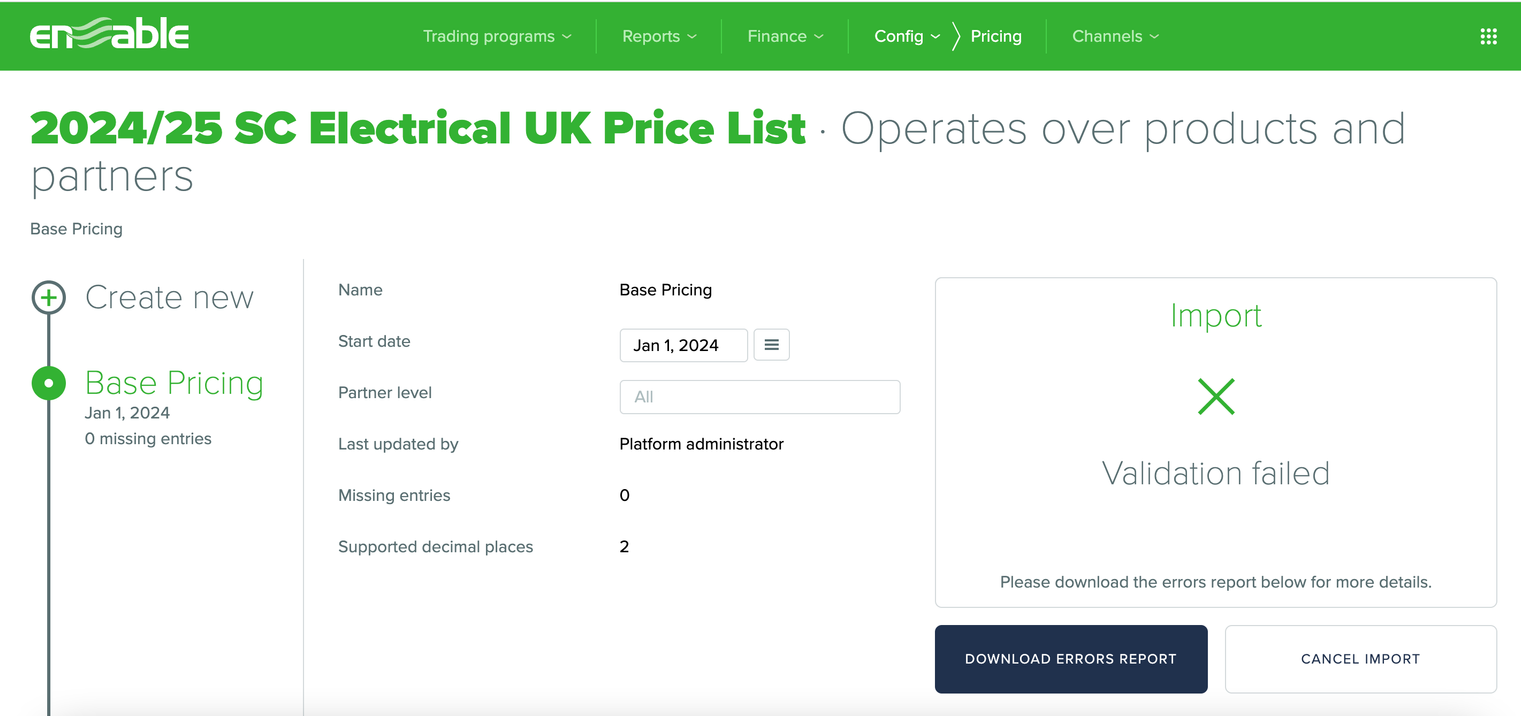
Step 4: The import will either indicate Validation complete if the uploaded prices have been successfully validated, or Validation failed if the template format is not as required. Follow the guidance below for further steps on each, in order to complete the upload of your price list.
The bottom of the screen will display the number of entries the CSV contains in the file, and the number of entires with missing prices in the file (example below).
Step 4a: Click Start import if you are happy with the entries to be imported. The import process will begin, and a message will display on the right of the page once the import completes.
Alternatively, click Cancel import to make any amendments to the file before restarting the upload process.
Step 4b: Click Download errors report to see more details of the errors for the applicable rows of the file, for you to amend before you Cancel import and restart the upload process.
Need help adding a price list to a trading program for rebates? Click here to learn about the fixed percentage of price mechanism for a program line.
Need help adding a price list to distributor terms on a new SPA? Click here to learn how to select a support mechanism and add distributor terms on a new SPA.
Need help adding a price list to end-customer terms on a new SPA? Click here to learn how to select an end-customer mechanism and add end-customer terms on a new SPA.